
Tale of Woe plot
|
WALKTHROUGH - CHAPTER 1 | |||||||
| |||||||
|
Step 1 - Looks like Sophie came back to her Shack! Visit it now and she will growl at you to go away. Sophie's Shack View quest items Sophie's decrepit shack stands before you, in a swampy part of the Haunted Woods.  Click on the button that says "Flee in terror!" and you will be directed to the damp cave. Damp Cave You flee in terror from Sophie's wrath, and after a while realize you're lost deep in the woods.  You may notice that your Charred Locket is no longer in your Quest Items Inventory. Don't worry, Sophie took it as shown in the comic. Go into the scary cave. The cave is made up of 9 different rooms scattered with 7 different items. The rooms look like the numpad on your keyboard: 7 - 8 - 9 There are 5 removable items...
... and 2 non-removable items.
To remove an item, click on its image when you see it on the floor of your cave. To put down an item, click anywhere on the floor. You may only carry one item at a time. Step 2 - You can move around between the rooms by clicking on the openings on the wall.
Sometimes while you wander around the rooms, you will see "something seems to be following you"... Damp Cave 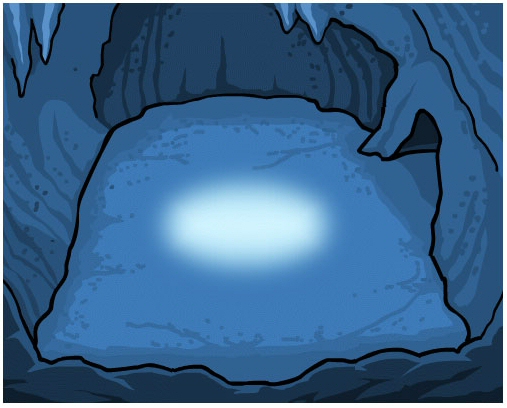 Something seems to be following you... ... and in a click or two, you will be chased by a growling beast. (Gee.. angry growling Neovians.) Damp Cave  You flee into another chamber of the cave and catch your breathe. Click on "continue" and you will be directed to a random room in your cave. Just continue on ;) Move around until you find a room with a light spot in it, such as this:
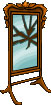
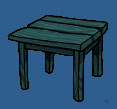
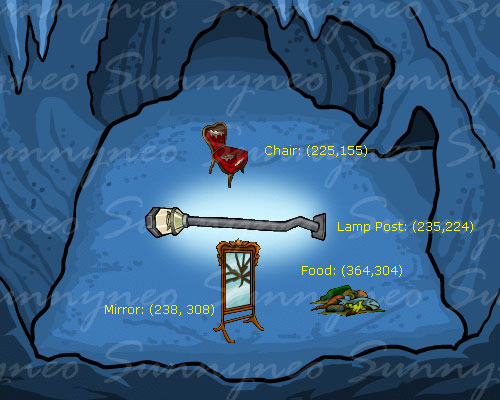
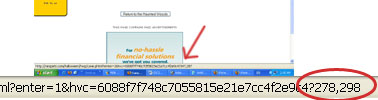
There are two rooms in your cave with such light spot in it. Set up either one of them with the Broken Mirror, Chair, Lamppost and Rotten Food as shown below. The coordinates don't have to be exact, as long as the image of the item appears in the right spot. (Food can anywhere in the room, the beast will eat it.) I left my coordinates on the image in case you run into any problems. You can find out where your current coordinate is by looking at the status bar on your browser. (see below)
I suggest for you to put Rotten food down last, as the beast will eat the food everytime he runs into you while you are trying to set up the room. Not only will this delay your setup, you can only pick up rotten food from the garbage pile a certain amount of times before it says "it's too smelly, you should come back later". You will have to wait 5-10 minutes before going back to pick up more food. When you have everything down in their spots, wander around the rooms again to try to run into the angry beast. If you run into him when your mirror isn't in the right spot, you will see this: Damp Cave You flee into another chamber of the cave and catch your breathe. If you have the food and mirror in the right spot, but not the lamppost, you will see this: Damp Cave  The mysterious, hulking creature stops and sniffs at the pile of rotten food on the floor. It picks up the food and eats it It seems to have an odd effect on the creature -- it's gotten all dizzy! It careens around the room. 
The creature dizzily gazes at the chipped mirror -- and it seems terrified by its reflection! Whimpering, it turns and flees. After a moment, the creature shakes off its dizziness and flees into another part of the cave! If you have everything right but the chair, you will see this: Damp Cave The mysterious, hulking creature stops and sniffs at the pile of rotten food on the floor. It picks up the food and eats it It seems to have an odd effect on the creature -- it's gotten all dizzy! It careens around the room.
The creature dizzily gazes at the chipped mirror -- and it seems terrified by its reflection! Whimpering, it turns and flees. After a moment, the creature shakes off its dizziness and flees into another part of the cave! 
The creature doesn't look where it's going. It trips on the lamppost lying on the floor! After a moment, the creature shakes off its dizziness and flees into another part of the cave! Just pick up the item that's in the wrong spot and replace it in the right coordinate. Once you have everything right, you will see this: Damp Cave The mysterious, hulking creature stops and sniffs at the pile of rotten food on the floor. It picks up the food and eats it It seems to have an odd effect on the creature -- it's gotten all dizzy! It careens around the room.
The creature dizzily gazes at the chipped mirror -- and it seems terrified by its reflection! Whimpering, it turns and flees. After a moment, the creature shakes off its dizziness and flees into another part of the cave!
The creature doesn't look where it's going. It trips on the lamppost lying on the floor! 
It falls toward the ground, and whacks its head on the chair. 
The creature lies in a pool of moonlight, and you get your first good look at it. It appears to be an overgrown, misshapen Gelert. He whimpers sadly, no longer seeming like a dire threat. Slowly, you begin to approach the creature, holding out your hand in a tentative gesture of friendship... 
Note: Sometimes it takes several encounters with Bruno for the last page to appear even if you have everything set up correctly. Just keep clicking around until it does. If it still doesn't after a long time, try moving all your items to the other lighted room. - END OF CHAPTER 1 - Continue to Chapter 3 >> Back to top |


 {{ loadingMessage || 'Loading, one moment please'}}

