
GIMP Scan Lines Tutorial
This tutorial will teach you how to place scan lines on your images! GIMP is a free image software and can be downloaded from the following links:
GIMP Download page
There are numerous versions of Gimp, and this tutorial will teach you how to create scan lines on version 2.6.8. You can still create Scan Lines on other versions, although the buttons and tools might not be in the same places or have the same names as they do in this tutorial.
What are Scan Lines?
Scan Lines are a black, grey, diagonal, vertical, or horizontal line scheme that repeat over the top of pictures or graphics to make the picture stand out and give it a more organized look. Sometimes you'll find them in different colors, but a majority just stay with grey and black.
This is the image we will begin with:

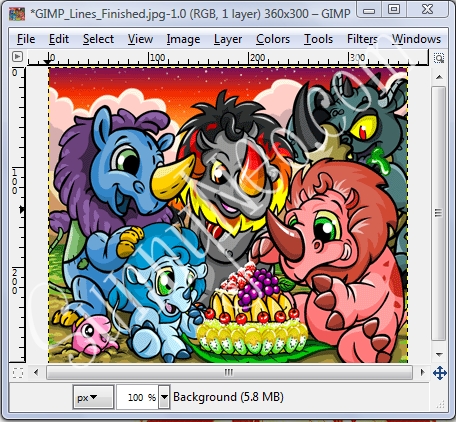
When you are all done with your picture, your lines should come out something like this:

There are two ways to use scanlines; by saving them as a pattern or by using scan lines from your clipboard. Both ways are described below. This tutorial also describes how you can add color effects to your scan lines.
Using Scan Lines saved as a pattern
Step 1: Open your Scan Lines Template
First, open up your GIMP program. Click on 'File' in the window that pops up and then 'New'. A window similar to this should pop up:
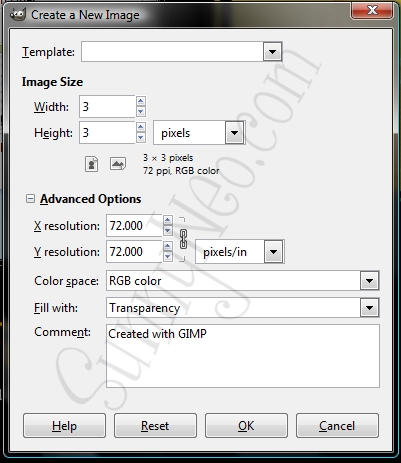
Start off by entering 3 in both the boxes next to width and height. This tells Gimp that you want the image to be 3 by 3 pixels. It is vital to the process that the image is transparent. To do this there should be a '+' (plus) sign next to 'Advanced Options'. Click the plus sign and a set of new options should appear. Keep all of the options the same except the drop-down box next to 'Fill With:'. Click it and choose the Transparency option. Click 'Ok'. After clicking 'Ok' a window like this should pop up:
Step 2: Zooming in and Starting your Scan Lines
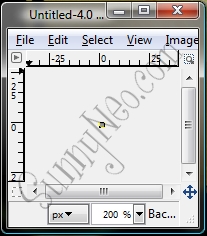
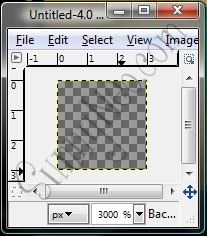
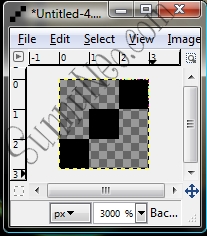
Obviously, this 3 by 3 square is very difficult to work with. Meaning we must zoom up on it before we can start our work! At the bottom of your 3 by 3 square window, there should be something that says '100 %' or '200 %' with a drop-down arrow next to it. Regardless, the number that is in there, change the number to '3000 %' and then hit 'Enter' on your keyboard. You should notice your square gets much larger so it is much easier to work with. Also, don't mind the grey and black checkered squares, they just indicate that the image will be transparent and will not show up on the picture when saved. Now, you should be at the image on the right, from the image on the left:
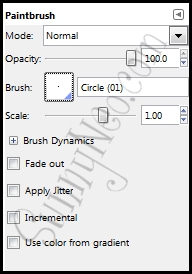
After you are zoomed in, bring up your tool box and click on your pencil tool from your tool box, it looks like this:
Below your tool box or in a separate window there should be a set of options. Find 'Brush' and click the box next to it. Find the smallest circle, which is the equivalent to one black pixel, it is very small. Next to the brush selected, it should say 'Circle (01)'. If it does, you're all set. Once that is done, your Pencil Options should look similar to this:
Step 3: Drawing your Scan Lines
Now that you have all of your options set and ready, you're able to draw your Scan Lines! Now bring your 3 by 3 square window back up. Bring your cursor down to the bottom left corner and click once, a black square should appear, like this:
Now continue to make a black square in the middle of the 3 by 3, sitting on the top-right corner of the bottom left square, then another in the top-right corner. Your finished product should like this:
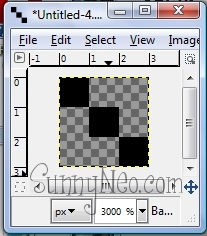
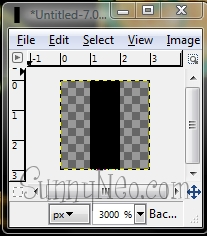
You are also not limited to just right diagonal Scan Lines. You can also make left Diagonal, Vertical, and Horizontal Scan Lines. In the rest of the tutorial, the sample images will use Right Diagonal but you're free to use whichever you prefer. Here are some other examples:

Step 4: Saving your Scan Lines to GIMP
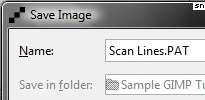
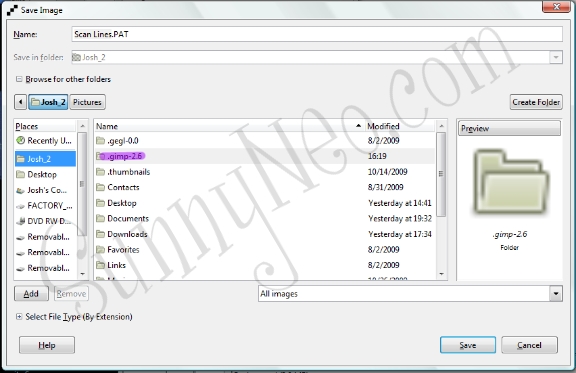
Now that your Scan Lines have been created, you can save them. On your 3 by 3 window click 'File' then 'Save as'. Your save as window will pop up, name the file something such as 'GIMP Scan Lines' or just 'Scan Lines'. DO NOT SAVE YET! This next part is very important. In this example it is using 'Scan Lines' as the file name. Directly after the file name it is very important to type '.PAT'. So, when your done it should look like 'Scan Lines.PAT'. '.PAT' just means that this is a pattern file, which is what we want. Here is what the file name should look like in the save as window (Remember not to save yet):
Below where you name your file there should be a '+' (plus) sign that says 'Browse for Other Folders', if it's not open already, click the '+' sign. You want to click the folder with your computer name on it. In the example below, it shows the computer name Josh_2, this is the folder that holds all your other general files. (Music, Pictures, Videos, Downloads, etc.) After you click this folder, find a folder that looks something similar to '.gimp-2.6', open it. Example (Highlighted in purple is what you should click):
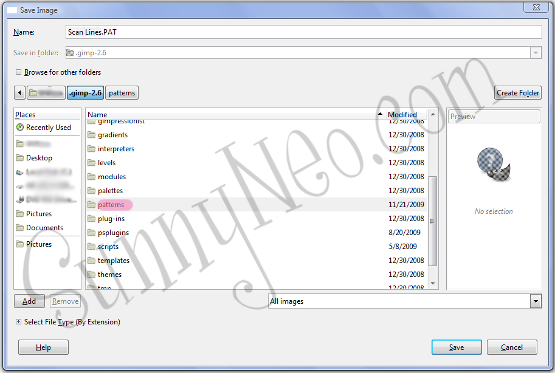
Inside this primary .gimp-2.6 folder you should find many sub-folders, but the one we need to focus on is the 'patterns' folder, find that folder and open it up. There may or may not be files in the folder, regardless, just ignore it. After you have the patterns folder open, save your 'Scan Lines.PAT' in it. After the Scan Lines.PAT file is saved into the patterns folder, restart GIMP and your Scan Lines are ready to use!
Step 5: How to use and input your new Scan Lines on a picture
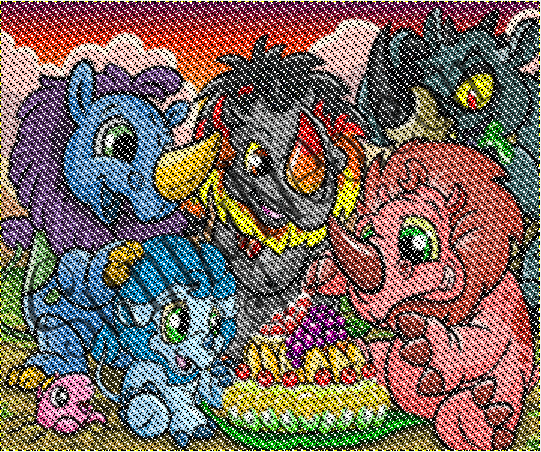
Now that your Scan Lines are drawn and saved we can finally use them to their best ability! In this tutorial, we'll use part of this Neopets background of a group of Tonus, which you can find here. Right click the image of the tonus and hit copy, on GIMP click "Edit", then "Paste as new image" and the image should appear like this:
At this point, you should add a new layer, so that your scan lines can be tweaked.
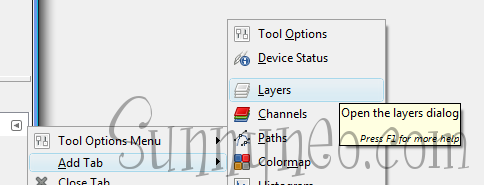
In the Toolbox, go to the layers tab.
If your Gimp Toolbox doesn't have this tab, you'll need to add it. Click on the little arrow next to the other tabs, select "add Tab" and then click on the icon of three pieces of paper stacked on top
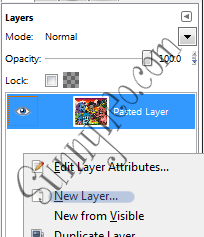
Now, inside the box with the current layer (the picture you want to put scan lines on) right click and select "New Layer."
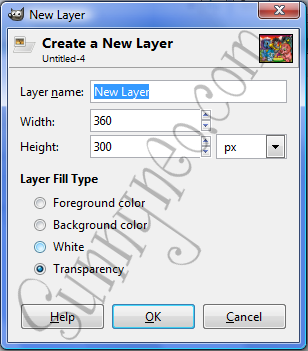
A new window should pop up. Under "Layer Fill Type" select Transparency, so the new layer will be clear. Then click ok.
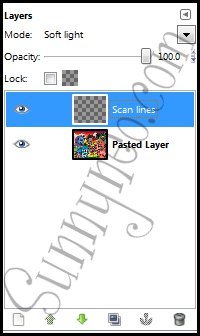
Now, in your layers tab, change the mode to "soft light."
After you've got your picture and new layer up, go back to your tool box and click the bucket fill tool.
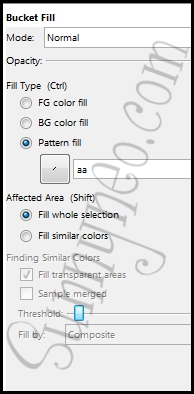
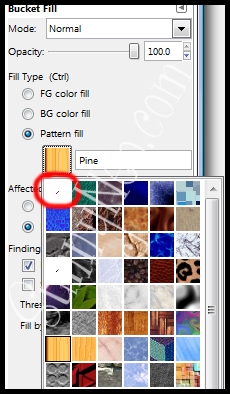
Another set of options should pop up below the tool box or in a separate window, they should be the Bucket Fill Options. There are quite a few things you need to change with the original options.Look for the 'Fill Type:' with three tick boxes under it. Click the 'Pattern Fill' box and then click on the box with all your different patterns. Look for the pattern that is basically a very tiny, vertical, horizontal, or left/right diagonal line. That's the Scan Line you just drew and transferred! Choose your scan line then click the 'Fill Whole Selection' under 'Affected Areas'. After this, your options should look similar to the options below: (Bottom)
Then, bring up your picture and simply click it. You should notice that black lines will fill up your picture.
...and voila! You've got yourself a fancy Scan Line-Filled picture that you can show off on your user lookup, pet lookups, and petpages!
Using Scan Lines through clipboard
This would normally be used if perhaps you wanted to make a different color or pattern of scan lines but didn't want to go through the proccess of saving and restarting Gimp and having to do all of the steps over again for something you might only use once. To do this, repeat steps 1 - 3 with the color/pattern of scan lines you would like. Instead of saving the scan lines, click "Edit" and then click "Copy Visible". After this, go to your tool box and click the "Bucket Fill" icon:
If you click on the tick box that says "Pattern Fill" and then click the square under it to choose your pattern, the first option should be the scan line that you just copied visible before, it's located here:
Repeat all the steps as you would from there, and you should have a spiffy scan lined image!
Applying Color Effects To Your Scan Lines
Sometimes, black grey and white scan lines just don't match your picture's color scheme. This method will allow you to add special color effects using the gradient tool. To start off, select the layer with your scan lines, and then choose the Color Select Tool.
This tool allows you select all the pixels containing a certain color in an image. Select the scan lines (not the transparency). Moving dots or ants will surround the lines. With this area selected, you can't affect any other parts of the image.
Next, pick the Gradient Tool.
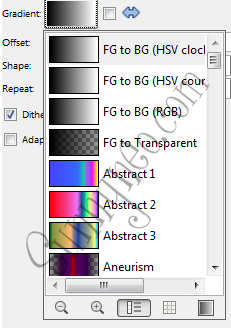
The Gradient Tool is used to spread colors that blend across an image. This is done by choosing multiple colors, and dragging a "preview line" across an image. The beginning of this line is the first color, and end of the line is the second color. Fortunately, Gimp comes with some pre-made gradients. To select them, click on the rectangle next to gradient and then choose your preferred gradient from the drop down list.
Since the image is all ready, apply the gradient to your liking by dragging the preview line across the image, with the color you want first at the beginning of the line, and the color you want last at the end. In this image, the Gradient "Abstract 1" is used. (In the image below, the selection has been removed so you can see the Gradient preview line)


Deselect the image by clicking on 'select' and then 'none' or shortcut Ctrl + Shift + A. And that's it! Notice how the color of your scan lines can affect the overall mood of the picture. Now that you know how to select only the vector lines, you can apply many different effects with brushes and other tools. Congratulations, you've mastered the art of scan lines!
How to present your image on a lookup, pet lookup, or petpage
Upload your image and find it's direct link or url. Then, put that url into the code below where it says YOURLINKHERE. After that, put the finished code on a petpage, userlookup or any other place you want to use your image.
<img src="YOURLINKHERE">
If you're not exactly sure how to upload images, use SunnyNeo's Uploading Images Tutorial.
 {{ loadingMessage || 'Loading, one moment please'}}

