Uploading Images Tutorial
What does uploading images mean?
If you make an image on your computer, and you want to show it to other users online, you need to upload it. This means that you put the image on a webserver. If you do not do this, people will not be able to see your background, banner, blog etc. This tutorial teaches you how to upload images. In order to do this, we will show you a few example sites on which you can upload images.
Note: in order for images to show up, they must be uploaded on a webserver that allows hotlinking. If the webserver you uploaded your image on does not allow this, your image will show up as a red x. All of the webservers used below do allow hotlinking.
The sites that are discussed below are Photobucket and ImageShack. It's up to you to find the one you like best.
Photobucket.com
This part of the tutorial shows you how to upload images on photobucket.com.
Photobucket supports the following file types:
| Images: | gif, jpg, jpeg, png, bmp, swf |
| Videos: | 3g2, 3gp, 3gp2, 3gpp, 3p, asf, avi, divx, divx, dv, dvx, flv, gif, moov, mov, mp4, mpeg4, mpg4, mpe, mpeg, mpg, qt, swf, wmv, xvid |
For free Photobucket accounts limits are:
| Images: | 1 MB each |
| Videos: | 5 minutes playing time, 100 MB file size. |
| Total Storage Space: | 1 GB |
| Bandwidth: | 10 GB of monthly bandwidth |
Creating an account
Before you can upload your images on Photobucket, you need to create an account.
n the Photobucket start page, in the top right corner, you will see a button that says 'Join Now'. If you click on it, it will take you to this page.
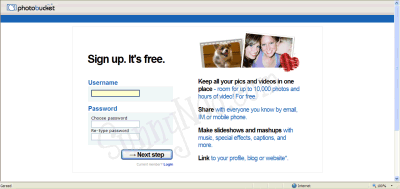
On this page you pick a username and a password. The website will tell you if your username is already taken and will suggest other ones, if it is. You can pick one of the suggested names, or go with something else that isn't already taken. The site also suggests that you make your password an 8 character long combination of letters and numbers. Make sure your password is not the same as the one you use on neopets!
Then you will be taken to another page where you have to fill in other information such as your name, gender, birth date and e-mail address. You need to fill in all the fields. You don't need to enter your real first and last name. For the e-mail address it is suggested you fill in a working one, because if you forget your password it will send it to you by e-mail. You will however receive the photobucket newsletter, but you can turn off this option in your account options after you created your account. You need to be older than 13 to use the service, if you're not, ask a parent to make you an account.
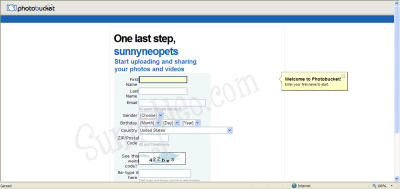
Uploading your image
Now your account is created, it's time to upload some images! On the screen you are directed to after signing up for your account you can upload your images from your computer on the webserver. By clicking on Browse you can locate the image on your computer. After you have found it click on Open. Then your image will be added to a list of images that the site needs to upload. After you've selected the images you want to upload, click on upload.
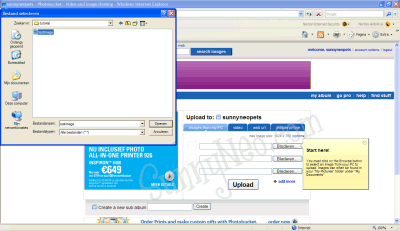
You will then be taken to a page that says '1 of 1 image has uploaded!' This means you have successfully uploaded your image! Scroll down the page and you will find that your image has been added to you album.
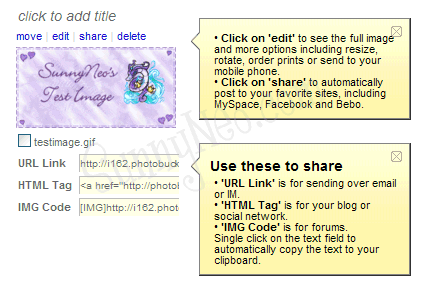
This means your image is ready to use! You can now use your image as a banner, blinkie, background, blog etc! In order to do this you will need to use the image URL. You can find it in the field that says 'URL Link'. In this case, the URL of the imaged used is:
https://i162.photobucket.com/albums/t267/sunnyneopets/testimage.gif
ImageShack.us
This part of the tutorial shows you how to upload images on imageshack.us.
ImageShack supports the following file types:
| Images: | jpg, jpeg, gif, bmp, tif, tiff, swf, png |
For ImageShack accounts limits are:
| Images: | 1024 KB each |
| Total Storage Space: | unlimited |
| Bandwidth: | 100 MB of hourly bandwidth |
Creating an account
For ImageShack it is not necessary for you to create an account. However we do suggest you create one. An account will enable you to delete images, if you don't have an account you can not delete the images you uploaded. If you then regret uploading something, it will be stuck online forever.
If you have decided you want to create your own account, you must click on "(register to create your own)" at the front page of ImageShack. This will take you to a registration page.
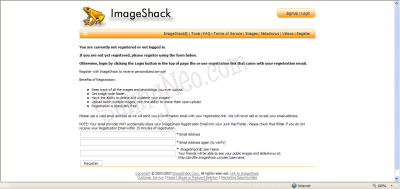
On this page you will be asked to fill in your e-mail address (this is needed because they will send you an activation code) and a username for your account.
After you've filled in the form you will be brought to a page that says:
Account Creation Complete!
Please Check your email for login instructions.
This means it's time for you to check your e-mail. Find the e-mail from ImageShack and click on the activation link. After you've done this you are logged into your account. The website automatically generated a password for you and e-mailed it to you, but you can change this on the website.
Uploading files
In order to upload images you need to click on 'Images' in the toolbar at the top of your screen. You will be brought to a page that says: 'no matching images found'. On your right side of the screen you will see a menu. One of the options is 'Upload Image'.
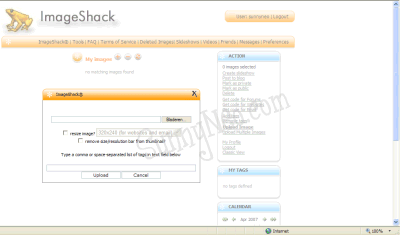
Browse your computer to locate the file you wish to upload. After you have located the file on your computer and click on open. Then click on Upload. ImageShack will then upload the image on their webserver. Then you will be shown a thumbnail of your image.
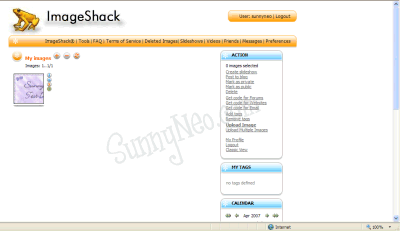
On this page you can click on your image to select it. Then click on 'Get code for Email' on the right side of your screen. A window will pop up which gives you the URL of your image.
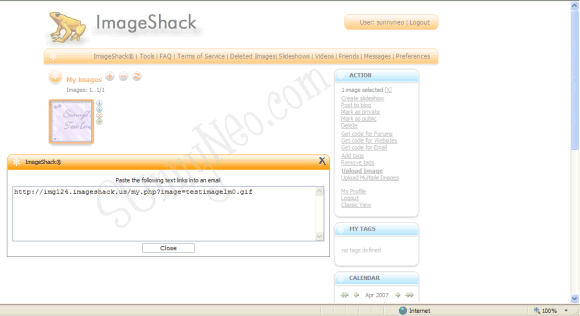
The URL you need to use to use your image as a blinkie, banner, background, blog etc. In this case the image URL is:
https://img124.imageshack.us/img124/1258/testimagelm0.gif

 {{ loadingMessage || 'Loading, one moment please'}}

