
Trasparent Images
in Paint.NET
What is this tutorial about?
Have you ever had a transparent image on a dark background to discover horrible little, lighter pixels around your image? If so, then this is the tutorial for you! The aim of this tutorial is to make almost any transparent image look great on a dark-ish background, varying from black to dark hues of any colour!
For this tutorial you will require a program known as Paint.NET (download it here for free).
This tutorial was made with v3.5.3, older versions may have different looking menus but the tools and ideas should remain the same.
 |
 |
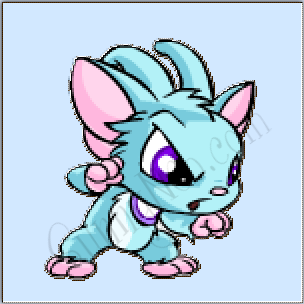
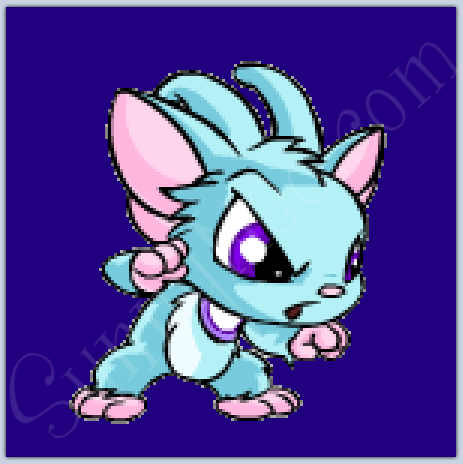
For this tutorial, we'll be using the old attacking baby Acara pet image. Once you have found your image, right click and select copy (or copy image if you're using Firefox).
Tools for this Tutorial
For this tutorial you should only need to use four tools; the Magnifying Glass, Paint Bucket, Magic Wand and Colour Picker. The uses of these tools will be explained when you need to use them in the tutorial.
 |
 |
 |
 |
| Magnifying Glass | Paint Bucket | Magic Wand | Colour Picker |
Tip: If at any time you find that a box referred to is missing from your screen, e.g. the 'Layers' or 'Tools' box, you can make it re-appear by selecting the corresponding name from the 'Window' drop down menu.
Step 1: Starting Up
First, open Paint.NET.
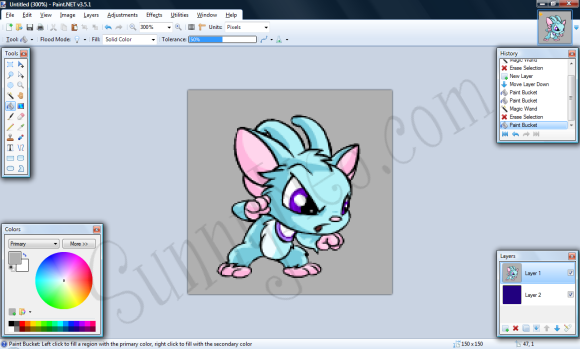
Paste your image into a new image. You can do this by either selecting 'Paste Into New Image' from the 'Edit' drop down menu, or you can use the keyboard shortcut Ctrl+Alt+V. Your screen should then look something like this:

Step 1.1: Using the Magnifying Glass
Before you start editing, you need to zoom in! The Zoom tool is located in one of the three top bars. It is highlighted with a red border in the image below to help you find it. To zoom in, use the magnifying glass with the '+' symbol on it (the one to the right of the drop-down box that says 'window'). To zoom in or out by a certain amount, you can also select a pre-defined value from the drop-down box. For this tutorial, try using 300% zoom. You can zoom out the same way, by using the magnifying glass with the '-' symbol on it.

Tip: You can also use the Magnifying Glass tool from the 'Tools' box (shortcut key 'Z'). With this tool, click anywhere on your image to zoom in by 100% (double the size of the image) each click. To zoom out with this tool, right click anywhere on the image to zoom out by 100% (half the size of the image) each click.
Step 2: Removing the Base Background
If your image is on a plain colour background such as the one we're using (the background is plain white) you'll need to remove the background colour and replace it with another. The reason for this is so you can see the lighter outlying pixels around your image by placing a darker colour behind them. It is difficult to see near-white pixels on a white background.
Click on the 'Magic Wand' tool in the Tools menu on the left of the screen (or, use the shortcut key 'S').
Select the image's background by left-clicking on any part of the background with the Magic Wand.
You can ensure that only the background is selected by trying the settings shown below.

An image with only the background colour selected should look something like this:
If your image looks like this when you use the magic wand tool;
You'll need to adjust the 'Tolerance' bar. The Tolerance bar controls how many similar colours are selected when you select one colour with the Magic Wand or Paint Bucket tools. When the Tolerance bar is set to 0, only the exact single colour is selected and the number increases with increases in the tolerance percentage. 100% will select the entire image. For the baby acara, the Tolerance bar had to be around 50%, which is default.
Step 3: Pinpointing the Imperfections
When you've highlighted the background you want to get rid of, hit the Delete button on your keyboard or select 'Erase Selection' from the 'Edit' drop-down menu to remove it.
Once you're left with an image with a seemingly-transparent background, the background should be filled with gray and white squares. These squares are not an actual background on your image, rather they indicate a transparent area. Next, add a new layer to the image by selecting the first icon underneath the layer preview box (shown here with a red border).
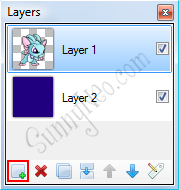
Move this layer underneath your original image by selecting the blue down-pointing arrow (also located underneath the Layer preview box).
You can tell which of your layer is 'active' at any time by checking which one has the light blue background around it. This is important because your tools will only work on the layer you are currently have active! For example, if you try to select something on the acara layer but your new blank layer is active you will only select that layer! Changing your active layer is as simple as clicking on the one your want to be active. For now keep the new layer active.
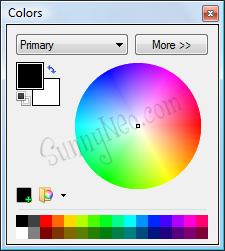
You can change your primary colour at any time by simply left-clicking on any colour in the 'Colors' box (pictured below) which should be in the bottom left corner of your screen. If it isn't there, select 'Colors' from the 'Window' drop down menu to make it appear.
By using the Paint Bucket tool from the 'Tools' box, floodfill your new layer in a dark colour (here dark purple is used, but any dark colour other than black should work). To use the Paint Bucket tool simply click anywhere on your blank layer to fill it all in your selected colour.
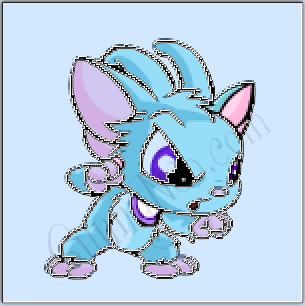
Now you should be able to see all the imperfections in your image's transparency!
To see the imperfections better, you can zoom in a bit more using the Magnifying Glass again.
Step 4: Filling the Background
First, set the baby acara layer as your active layer by clicking on it in the 'Layers' box. Use the Colour Picker tool to select the lightest colour you can find in the outline.
In the acara image, the colour highlighted by a red border in the image below was selected.
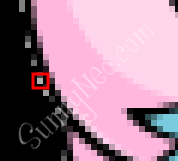
Now, using the Paint Bucket tool fill the background on the image's layer (not the second layer you added earlier!) with the colour you selected from the outline.
Your screen should now look something like the image below. Take note of the image itself and the 'Layers' box. You can see that your dark coloured layer is still there, but it is currently covered completely by the baby acara's layer.
Step 5: Clearing Outlying Colour
Now, back to the Magic Wand tool! You need to select as much of the outlying colour as you can with the wand before hitting delete, so adjust the Tolerance bar gradually. After each adjustment, try using the Magic Wand again. If it selects too much as you saw earlier, lessen the tolerance. If it selects too little, increase the tolerance.
If you find no matter what you do it selects too little, hold down the CTRL key while the Magic Wand is still active and you already have most of the background and pixels you're trying to remove selected. You should see a little '+' mark next to your wand cursor. This means if you click on another colour in the outline it will also be added to your current selection, allowing you to add more colours!
Once you've selected as much as you think is required, hit the 'Delete' key on your keyboard to remove your selection.
Your image should be cleaner now! If you find that you still have some outlying pixels, try repeating steps four and five. Each time, select a slightly darker pixel to fill the layer with. As the colours you select get closer to black (eg. dark grey), you will need less and less tolerance. If your image has a black (or near-black) outline, don't select colours too close to black as you may end up removing the outline as well! For the baby acara no more than two clearances should really be necessary.
Tip: You can check your outline occassionally by filling your dark layer with white to make sure you haven't cleared too much. Remember to set your dark coloured layer as active before using the Paint Bucket!
When you've cleared as much as possible, delete your dark-filled layer by clicking on the red cross in the 'Layers' preview box when your black layer is active.

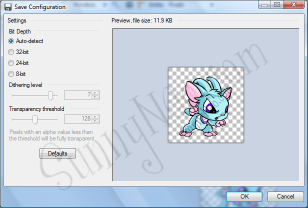
Save by selecting 'Save' (Ctrl+S) or 'Save As' (Ctrl+Shift+S) from the 'File' drop down menu and you're finished! After you hit save a message box titled 'Save Configuration' may pop up. Simply press 'Ok' at the bottom of the box to continue. If you select 'Cancel', your image will not be saved!
Conclusion: You're Done!
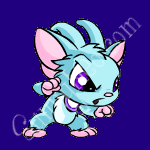
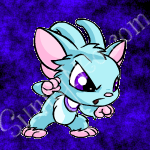
Eventually, your image should look quite nice on any darker background, as demonstrated below!

And in comparison, here is the original image without edits to the outline pasted on the same background as the edited version.
 {{ loadingMessage || 'Loading, one moment please'}}

