
Multi-coloured Gradients
in Paint.Net
What is this tutorial about?
This tutorial will instruct you on how to make multi-coloured gradients. In some graphic programs there are often gradients with 5-6 colours that can be automatically selected. However, in Paint.net onlt two-coloured gradients can normally be made. This tutorial shows how to make gradients with as many colours as you would like.
You will need:
Paint.net (free download here)
For this tutorial version 3.5.1 of Paint.net was used. It may look different from later versions, but the tools are the same.
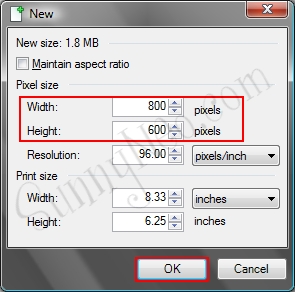
Step 1: Open a new image
Open Paint.net. Click File-New and set the height and width. For this tutorial you probably want an image about 800x600 or bigger. Click OK.
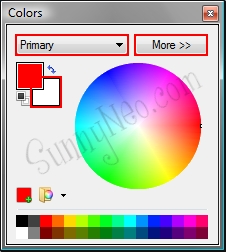
Step 2: Choosing your primary colour
This is the colour toolbar. If it is not in the bottom left corner of your screen, then you can go to Window in the main toolbar and click on 'Colors' to make it appear.

The basic colours should be black and white by default, which can be seen in the two squares above. Black is the primary colour. The primary colour is the main colour that will be used if you use tools such as paint can, paint brush, gradient and text. White is the secondary colour. The secondary colour is only used with tools that require two colours, such as gradient. Since both colours will be used, they both have to be changed from the black and white, to whatever colour desired.
The colour for the primary colour can be chosen by simply clicking on a colour, either in the colour wheel, or below in the boxes of the colour toolbar.
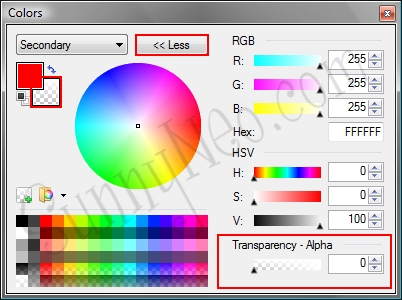
Step 3: Choosing your secondary colour
Now, because a multi-colour gradient is being made, the secondary colour needs to be transparent. Transparancy is just like see through. It allows layers below the current one to be seen. To set the secondary colour, simply click on the secondary colour box, which should be white. The dropdown menu that said "Primay" will now say "Secondary". Then click More to widen the colour toolbar.
At the very bottom of the colour toolbar there is an option to set transparency. Slide the little triangle all the way to 0, or just type 0 in the box beside it. Your secondary colour is now transparent. Click Less to make the colour toolbar smaller again.
Step 4: Background colour
Select the paint can from the toolbox(keyboard shortcut=f). Again, if this is not present on the left side of your screen, go to Window and click on 'Tools', to make it appear.
Now, just click anywhere on the canvas so everything turns the colour of your primary colour. This is only done in the background layer of the image.
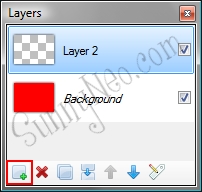
Step 5: Add a new layer & select your next colour
To add a new layer, click the plus sign in the layering toolbox. Layers are just different levels of an image. They all stack on top of each other to add something else to an image. Think of it as a sandwich. The bread, meat, lettuce and condiments all stack up and then come together to add unique tastes, just like the layers of an image.
Now, select the next colour for the gradient. Any colour can be chosen, but make sure to only change the primary colour, the secondary will stay transparent.
Step 6: Making the gradient
Now, click on the gradient tool under Tools(keyboard shortcut=g).
Make sure you are on Linear, Colour Mode and Normal blending as seen in the picture below.
Now, to make the gradient.
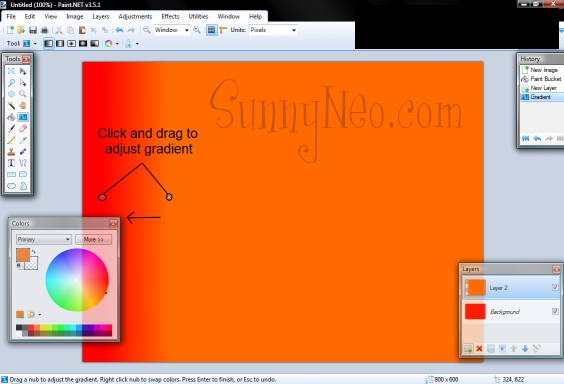
Use the above picture as a guide. Click about a quarter way into the canvas and hold down the left mouse button while dragging towards your left. When you let go, there will be two small circles flashing. These circles allow you to adjust your gradient. The first one(the one that appeared when you first clicked) determines where the transparency starts, while the second one(the one that appeared while dragging the gradient) determines where the gradient ends. You can also position the circles to create different angles, but for this purpose try to line them up so they are straight.
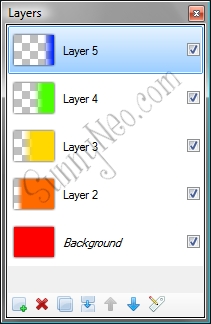
Step 7: Continue gradients
Now, just repeat steps 5-6, adding a new layer and changing the primary colour only for each layer. While creating each layer, just move the gradient starting postion a bit closer towards your right each time. The colours should start to blend together. This is what the layers will look like:
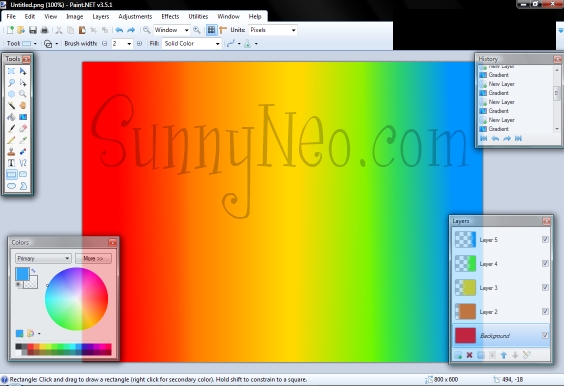
Do this until the whole canvas is full and it should look something like this.
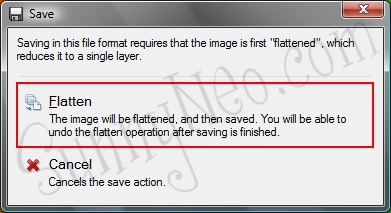
Step 8: Saving the image
Now to save it. Go to file-save as and select a type of image to save it as. Sometimes it's good to save it as a paint.net image(.pdn)and then a PNG or JPEG. Otherwise, you won't be able to edit it in individual layers again. On the following screen just click okay.
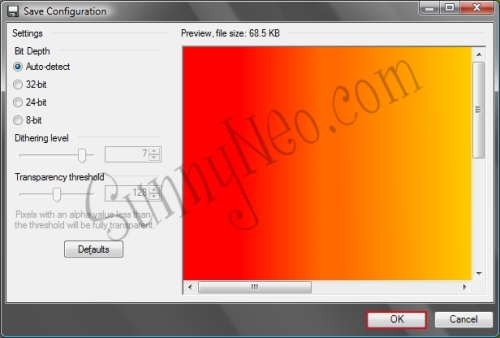
When it asks if it's okay to flatten the layers, say yes. It only asks to flatten the layers, if it is not being saved as a paint.net image.
Step 9: Applying the gradient to images/resizing images
And ta-da, you're done the gradient part!
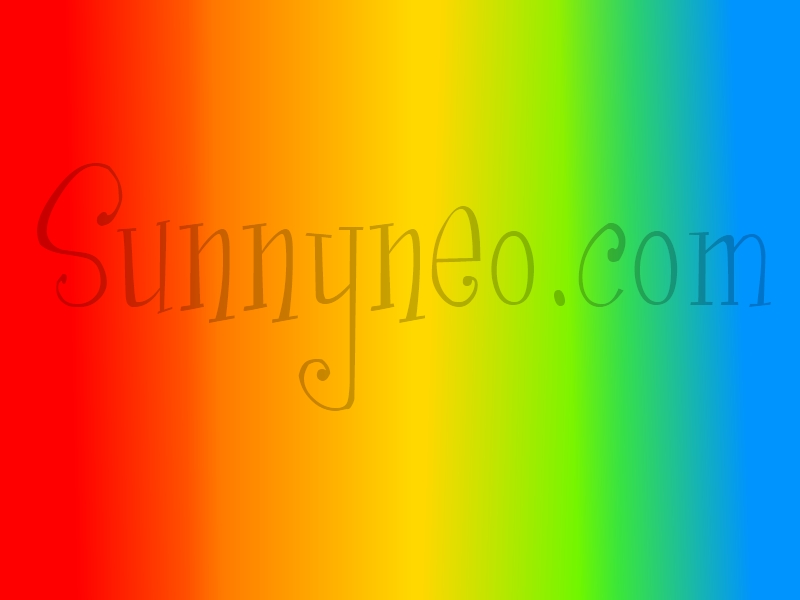
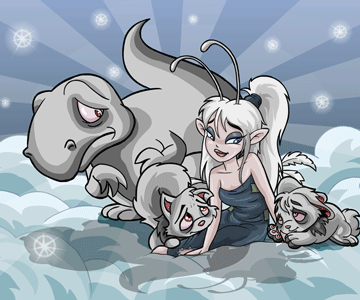
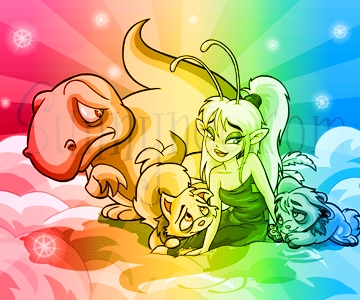
The gradient can now be used as a background or could be really useful to add effects in images. If you wish to continue on, find a nice image like this:
Save the image to your computer and press file-open and select your image. It will open in a new window. To switch between your image and gradient(which should still be open. If it is not, then open that as well) just click on the small thumbnails in the top right corner of paint.net. It displays every image that you currently have open. Now, if your image is a different size than the gradient(which is most likely will be), then the gradient will have to be resized to fit the image properly.
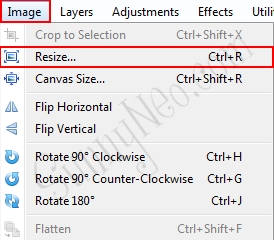
Now make sure you are in the gradient window, go to image in the main toolbar and then select Resize.
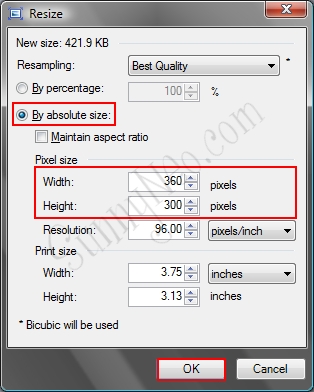
Now, as seen below you enter the dimensions of your image, not the gradient.
Tip: If you do not know the dimensions of the image, they can be found in the very bottom right of your screen in the window that the image is in. You want the set of numbers on the left that does not change (see image below).
Make sure before entering the dimensions that the "maintain aspect ratio" box is unchecked, or it will keep changing your numbers. After entering the the height and width, press okay.
Now go back to the screen with your image and add a new layer above your image. Return to your gradient and press Ctrl+A then CTRL+C to copy all of your gradient. Now go to the screen with your image and press Ctrl+P to paste it into the new layer.
Step 10: Blending modes and Opacity
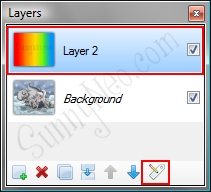
Next we're going to play around with Blending modes and opacity. They just blend images together in different ways. Double click on the layer with your gradient, or select the layer by clicking it once and hit the layer properties button to open layer properties.
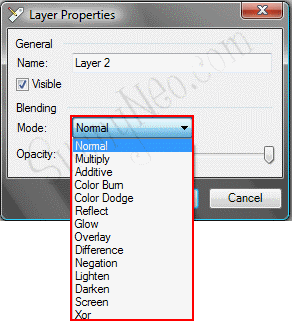
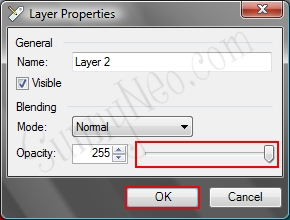
Now, just go through all the different blending modes as seen below. They will change automatically as you click them and choose the one that you like the most. Screen, Overlay and Lighten blending usually work well. Also, the opacity(how transparent a layer is) can be changed. Simply move the bar along until you get a desired opacity. Then click okay.
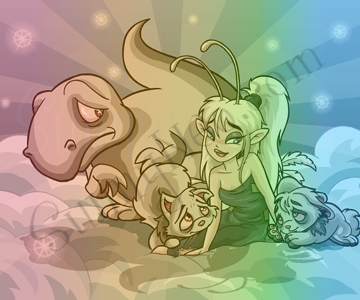
Now you're done! This is the image using overlay blending.
This is the image with just opacity, though feel free to combine the blending and opacity to get the look that you want.
Additional Info: Different types of Gradients!
By changing the gradient type to radial in the gradient toolbar you can make a gradient like the one below.

By changing the angle of the gradient, while using the linear mode, you can make a gradient like this:


 {{ loadingMessage || 'Loading, one moment please'}}

