
Transparent Images Tutorial - Paint Shop Pro
What is this tutorial about?
As you know most images come with a white background around them. This can be rather ugly if you're trying to make a layout with a dark background. This tutorial will teach you how to simply remove the white background around an image by using Paint Shop Pro 9 (this should also work for previous editions of Paint Shop Pro, but your menus may appear different to those in the screenshots). Below you can see an example of a transparent image, in case you are confused about the purpose of this tutorial.
 |
 |
For this tutorial, we'll be using the angry Kougra pet image. Once you have found your image, right click and select copy (or copy image if you're using Firefox). Heading back to Paint Shop pro, press CTRL and V to paste as a new image. You can also do this from the menu by clicking on Edit, Paste, Paste As New Image.
There are three different ways to achieve a transparent background. Different people prefer different things, by listing three different ways you can find out which one works best for you.
Palette Transparency
Step 1: Filling in the background
Select the flood fill tool, and put the tolerance to 100. As long as there is a clearly defined edge to your image, the flood fill should work perfectly. If the image has a less defined edge (like a cream border), you'll need to use a lower tolerance.


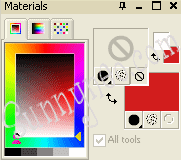
Select your colour by right clicking on the palette. Make sure you use a colour that doesn't already appear in the image (as anything the same colour as the background will also go transparent).
Then click on the background of the image to floodfill. Zooming in on the image using the mouse wheel, makes it easier to fill in the small area between the back paws.

Step 2: Setting the transparency
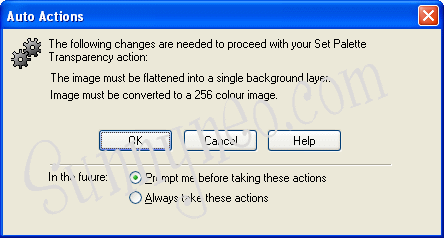
Next, click on Image, Palette, then Set Palette Transparency.
You may or may not get this message appear - if you do, just click on OK.
The next box that appears, gives you the option of which colour becomes transparent - make sure the radio button is clicked on the correct colour. If the background colour doesn't appear on the list, left click on the background of your image and the correct colour will appear in the box.
Clicking on the Proof button will let you check how the final image will look - the squares in the background show that area will be transparent.
Then, click on OK.
The background will look like nothing has changed - don't panic!
Step 3: Viewing the transparency
You can always make the image display the transparency, by going through the image menu again. Just click on Image, Palette, then View Palette Transparency.
Which will show the transparent background as squares.
Step 4: Saving the image
All that remains now is to save your image. Make sure you save it as a .gif or .png file (as .jpg and .bmp don't support transparency), and there is your final image ready and waiting to be used.
If you wish to upload your image somewhere and don't know how, please refer to our Uploading Images Tutorial.
 {{ loadingMessage || 'Loading, one moment please'}}

