
The Faeries' Ruin Plot
Puzzle Guide - Plain of Peace
| TABLE OF CONTENTS |
PLOT LINKS
|

[ Spells | Stabilization | Containment | Guidance | Suppression ]
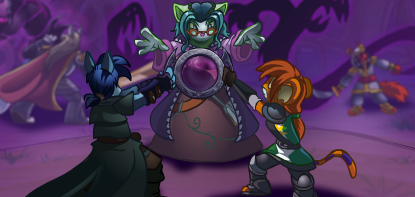
Xandra needs our help! On the Plain of Peace, Xandra is searching the artefact book for the proper spell, while Hanso and Brynn help her maintain the barrier spell that keeps the shadows from overrunning our heroes.
To participate in this puzzle step of the plot, you can choose to help with the search or strengthen the barrier.
In order for Xandra to complete the ritual, she must cast a series of spells. Help her find the next spell she needs by searching through the artefact book!
When you choose to help search the artefact book, you will see a large list of page numbers. You can choose any page that is not highlighted in light or dark grey. Each page is described with a coloured block, a small symbol, and a page number.
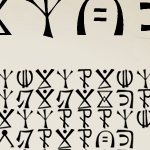
After you have clicked on an available page number, you'll see your page. You must choose the correct three symbols in the page title to decipher your spell page.
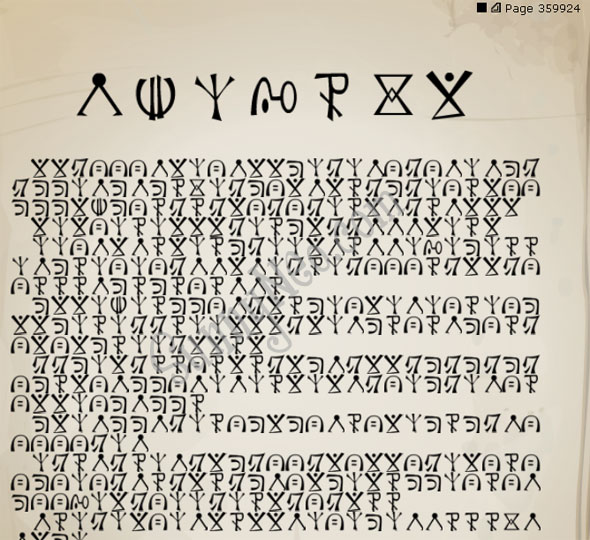
To solve this puzzle, choose the three symbols that are used least in the text below the page title. Sometimes symbols from the title will not be used at all in the lower text. When you have chosen three correct symbols, Xandra will say, "You deciphered the spell! But... hmm... no, this isn't the one I need. Keep looking, though. We'll find it sooner or later!"
The battlefield is swarming with shadow phantoms! Xandra cast a barrier spell around herself, Hanso, and Brynn, but it can only protect against the phantoms for so long. Help reinforce the barrier shield!
If you choose to help strengthen the barrier, you will be partnered with three other neopets players. Each is assigned a specific job for this task:
- Help stabilize the remnant's energy core - Stabilization
- Help contain the remnant's energy core - Containment
- Help guide the remnant to the barrier - Guidance
- Help suppress the remnant's energy spikes - Suppression
Your team will have to stabilize and contain while move the orb to the barrier edge, which can take several rounds. If your team is successful, you'll see the message:
"The orb of glowing energy is successfully guided into the barrier, strengthening it! Xandra relaxes a little as the barrier's strength grows, further protecting her, Brynn, and Hanso from the onslaught of phantoms."
If your team failed, you will see the message:
"The containment field decays, causing an explosion as the core bursts forth. After a few moments there is nothing left but a wisp of purple energy dissipating into the air. Xandra glares at you for a moment but goes back to her spellcasting. Perhaps you should try again."
Stabilization
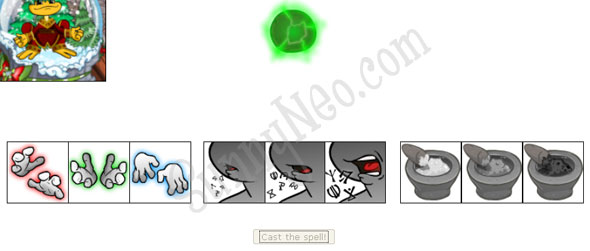
The Stabilization responsibility is to make sure the core does not become unstable.
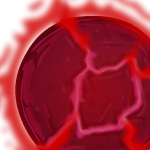
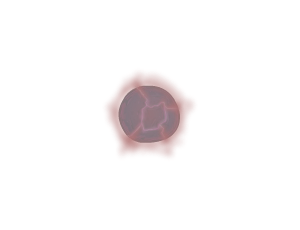
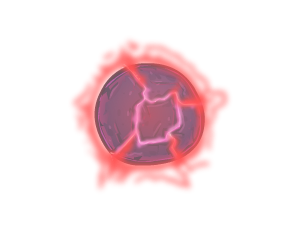
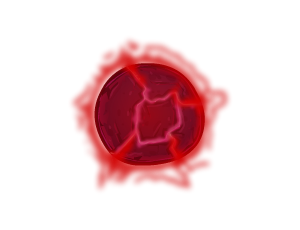
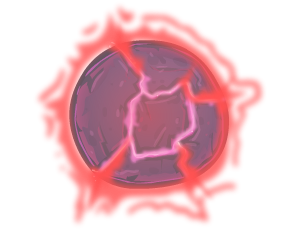
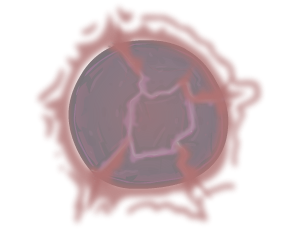
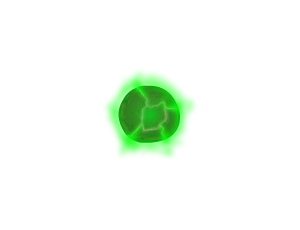
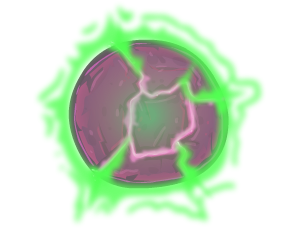
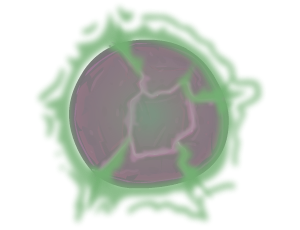
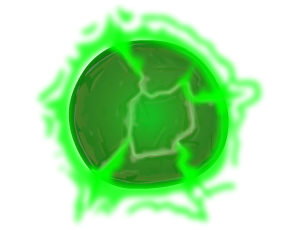
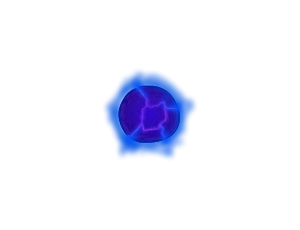
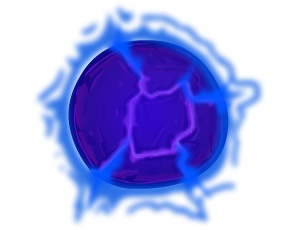
If you are taking the Stabilization role, you will see a picture of the core. It will vary in size and colour. You must choose a set of hands, a spell volume, and a sand colour for your spell. If you don't get the 3 correct options, then its considered unstable the next round, this causes more purple streaks for the person doing the suppressor job.
- Match the glow colour of the hands to the glow colour of the core.
- Use the whisper (smallest mouth and symbols) for the smallest core image, largest symbols for largest core.
- Choose white sand for the normal coloured core, grey for the faded core, and black for the most vividly coloured core.
| Red | |||||||
|---|---|---|---|---|---|---|---|
|
|
||||||

|
|
||||||

|
|
||||||
|
|
||||||

|
|||||||


| Green | |||||||
|---|---|---|---|---|---|---|---|

|

|
||||||
|

|
||||||

|

|
||||||
|
|
||||||
|
|||||||

| Blue | |||||||
|---|---|---|---|---|---|---|---|

|

|
||||||
|

|
||||||

|

|
||||||

|

|
||||||
|
|||||||

Containment
Containment is likely the most difficult task to complete successfully.
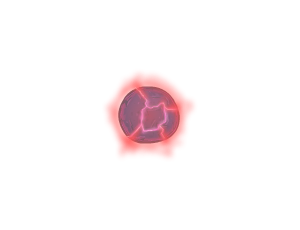
If you are taking the Containment role, you will see a picture of the core, marked into six segments. Each segment will have a percentage listed. You must choose an action to apply to segments and keep the percentage between 40% and 80%. If it falls below 40% or above 80% it will turn red. The first time you have something red, it puts you in "Volatile" state. If you have any red ones in the following round, you will go from "Volatile" -> "Rupturing". If you have any of the sectors in the red for a 3rd turn in a row, then the game will end.
| Color | Percentage Ranges |
|---|---|
| Green | 50% - 70% |
| Yellow | 40% - 49% 71% - 80% |
| Red | 0 - 39% 81% - 100% |
There are hands down the right side of the screen, you click the hand you want, and then click the sector you want to put it on. After you have all the hands on all the sectors you want you click the "Cast the spells!" button. Once you use an option, you can't use it again for one round, so think ahead.
You may not need to take action in each segment during every turn.
Method 1
Use each hand based on the % the sector is in. If you follow this exactly, it may get you through the round after a few tries. Method 2 usually works better for most people, but can be a little difficult to comprehend.
 |
|
Little increase Use around 56-60% |
 |
|
Small increase Use around 50-55% |
 |
|
Medium increase Use around 40-49% |
 |
|
Strong increase Use when it's <40% |
 |
|
Medium decrease Use around 76-80% |
 |
|
Strong decrease Use when it's >80% |
Method 2
This method can sometimes be the same as method 1. However instead of it being based certain hands are used on certain % ranges, its more flexible, but you have to be able to scan and react fast.
Think of the hands as #1-6. 1 being the top hand and 6 being the bottom hand. Try to keep everything in the 60%-73% range. Don't bother putting a 5 or 6 on a % unless its 75%+ unless you are in volatile/rupturing state and you want to be sure it wont go up past 80. Anytime its 75%-80% put a 5 on it, anytime its 81%+ put a 6 on it. Those are simple, you rarely have that many. If you are in volatile/rupturing state, it is sometimes wise to put a 5 on like a 73% or 74% as well just to make sure it doesnt go up in the red, if you have a 5 to spare.
Try not to use more than one of each # hand, unless you are in rupturing state (its worth the risk since you will more than likely fail unless you use them right then).
If you have any %'s that are the lower red or yellow (0-49%), throw a 4 on it. Then work your way up the hands, so after you put the 4 on the lowest (red/yellow) put the 3 on your next lowest %, then the 2 on your next lowest, and then a 1 on your next lowest. So lets say you have things at 48% (yellow), 52%, 53%, and 55%. You put the 4 on the 48%, the 3 on the 52%, the 2 on the 53%, and the 1 on the 55%.
If you dont have any in the yellow/red, do the same above stragedy but without the 4, so use 1-3 on your 3 lowest below 60% starting with the 3 on the lowest, 2 on the 2nd lowest, and 1 on the 3rd lowest under 60%. If you only have 1 or 2 under 60% then use your judgement, i usually use like a 3 on 50%-55%, a 2 on 55-57%, and a 1 on 58% or 59%.
Below is a round by round walkthrough, so you can kind of get a feel for how/when to use what, and what might happen.
| Screenshot | Details |
|---|---|
 |
• No Red/Yellow ones here. • Nothing in the upper range. • Hand 3 is on the lowest % which is 52%. • Hand 2 is on the 2nd lowest % which is 55%. • Hand 1 is on the 3rd lowest % which is 58%. |
 |
• A yellow in the upper range, its 75% so put Hand 5 on it. • Only 2 others to fix. • Hand 2 on the 56%. • Hand 1 on the 59%. |
 |
• Nothing in the upper range. • Lots of Red and Yellows here. • Hand 4 is on the lowest % which is 39%. • Hand 3 is on the 2nd lowest % which is 40%. • Hand 2 is on the 3rd lowest % which is 46%. • Hand 1 is on the 4th lowest % which is 52%. |
 |
• A yellow in the upper range, its 79% so put Hand 5 on it. • Only 2 others to fix. • Hand 3 on the 55%. • Hand 2 on the 56%. |
 |
• Lots of yellow here, but not all needs adjusted. • Since theres both 75% and 80%, you could put Hand 6 on the 80% and Hand 5 on the 75%, i risked it, as you can see in the next round, i shouldn't of :P. • Only 1 item in the lower range and its yellow, so put Hand 4 on the 46%. |
 |
• A red in the upper range, its 85% so put Hand 6 on it. • A yellow in the upper range, its 76% so put Hand 5 on it. • Only 1 low end to fix, so put Hand 2 on the 55%. |
 |
• No Red/Yellow ones that need fixed. • Nothing in the upper range. • Hand 1 on the 59%. |
 |
• No Red/Yellow ones that need fixed. • Nothing in the upper range. • Hand 1 on the 59%. |
 |
• No Red/Yellow ones that need fixed. • Nothing in the upper range. • Hand 3 on the 52%. • Hand 2 on the 55%. |
 |
• Nothing in the upper range. • Red in the lower range so Hand 4 on the 33%. • Hand 3 on the 51%. • Hand 2 on the 57%. |
 |
• No Red/Yellow ones that need fixed. • Nothing in the upper range. • Hand 3 is on the lowest % which is 54%. • Hand 2 is on the 2nd lowest % which is 55%. • Hand 1 is on the 3rd lowest % which is 57%. |
 |
• Nothing in the upper range. • A Yellow in the lower range, so Hand 4 on the 43%. • Hand 2 on the 57%. |
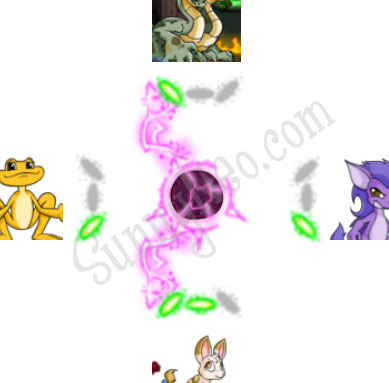
Guidance
The Guidance task is to steer the core toward the barrier.
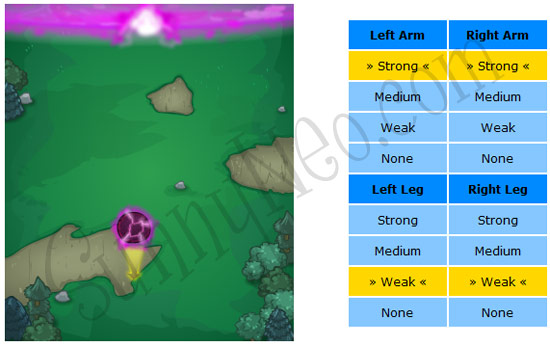
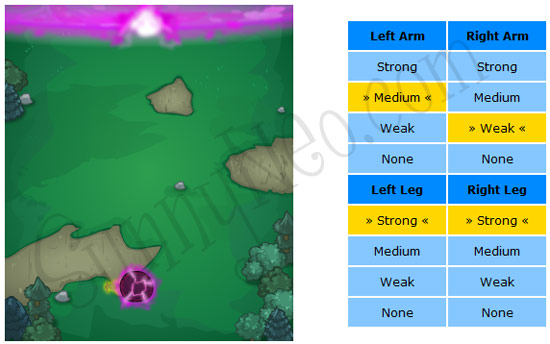
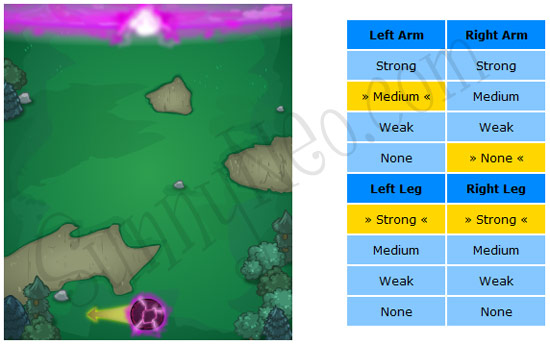
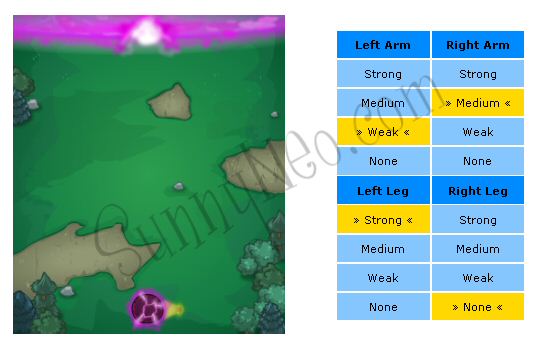
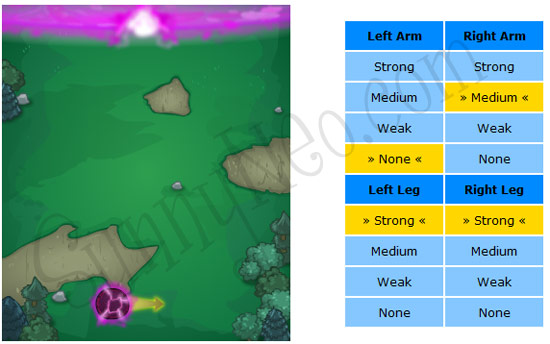
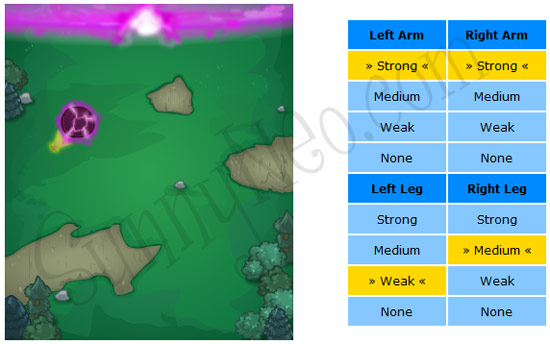
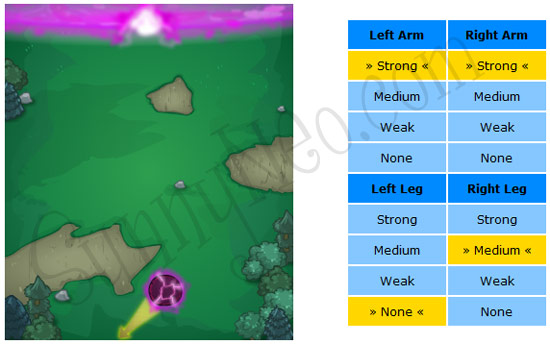
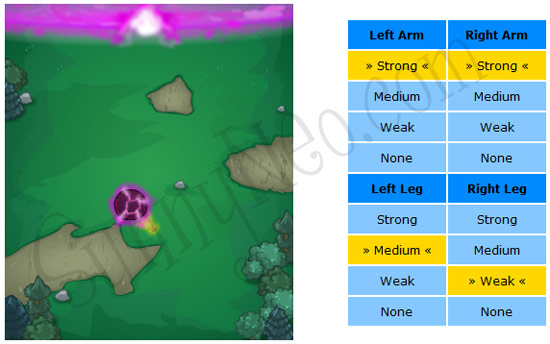
If you are taking the Guidance role, you will see a picture of the core on the Plain. It will show an arrow indicating the direction it is likely to move in the next round. You must choose actions for your pet's arms and legs. If you push too hard, you will fall down and be unable to move the next turn. You start with a distance of 100 meters and your goal is to get it down to 0. If you succeed, then the game is a success.
Choose your options then click the "Prepare to move!" button.
The below solutions will help you move your ball down the field a good amount of distance. However once you get to 30 meters, its not just about moving the orb forward, your orb needs to actually be in the middle of the map in order for it to go in the barrier opening. As you move down the field, when you get past the 30 meters mark, its like the field tapers towards the exit, so if you are not in the middle of the field or moving towards it, your orb will hit like a wall and go backwards instead of moving forward even if it usually would go forward with that same arm/leg combo. If the arrow is pointing towards the middle, instead of counteracting it, just let it go towards the middle (put both arms at none, and both legs at strong to just let the arrow carry it the direction it is pointing).

Suppression
The most important role is Suppression.
If you are taking the Suppression role, you will see an orb with a purple energy field around it, between images of the pets on your team. The energy field will show a spike where it will likely hit a pet on the next round. Each pet has three grey ovals where shields can be placed. Place a shield (by clicking the grey oval) to protect the pet from the next spike. Then click the "Lock shields in place!" button below your pet's image.
You start with 10 shields. If you place one shield, your number won't go down. If you place more than one shield, your amount will go down with every extra shield. So if you place 3 shields, you will have 8 shields left. If you don't place any shields, your amount wil go up with one shield. Don't try to earn shields in the early rounds. If the Stabilizor is doing their job, you won't have to deal with many spikes.
First priority is to protect yourself or else you won't be able to protect anyone in the next round. Second priority is your Containment. Third priority is the Stabilization, and last priority is your team's Guidance.
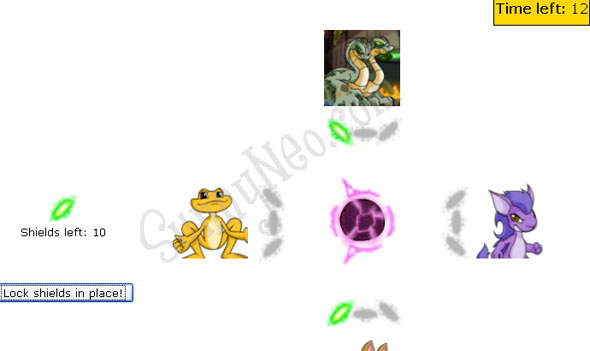
When the timer counts down to zero, results will be shown. You will be able to see where the spikes attempted to hit your team, and also the spikes that will threaten the next round.
At times, you might not have enough shields available to protect the rest against some of the spikes. Any pet that is hit by a spike will be stunned and sit out the next round.
Back to top
 {{ loadingMessage || 'Loading, one moment please'}}

