
Avatar Tutorial for Paint Shop Pro
What is this tutorial about?
This tutorial will show you how to make avatars with Jasc Paint Shop Pro 9 and Animation Shop 3. Other versions of Paint Shop Pro can be used, but there may be some differences.
The programs used are fairly old, you can find a free trial for of Animation Shop 3 here (click external mirror 1), and Paint Shop Pro 9 here.
At the end of this tutorial you will be able to make different kinds of avatars; ones that fade, ones that blink, and ones with funny shapes.


Making the Spite Avatar Base
Step 1: New Image
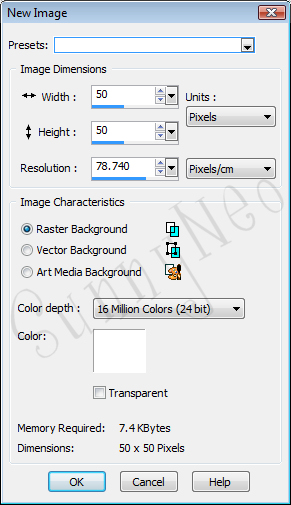
You're going to need to create a new 50 x 50 image; this means 50 pixels wide and 50 pixels high. Simply press CTRL + N to do so, or you can click the button that looks like this:
After doing so a new window will appear. In this window you fill in the height and width of the image.
Step 2: Adding an Image
You're going to need to choose an image before you can go any further. For this example, we'll be using a Spite Doll. Isn't she pretty?

Copy and paste your image into the 50 x 50 square by going to Edit - Paste - Paste as new selection.
Step 3: Adding a Border
Your image should now look like this.
Next, you'll need to add a border. There are two ways to do this; you can either set the brush tool to 1px, or you can do it the complicated way and go through the modify tools. Both ways will be explained below.
Make sure that you deselect your image (CTRL + D) before attempting to draw a border. You can also do this by going to Selections - Select None. Or, if you prefer, you can click this button and right click on your image to deselect it.
Method 1: Brush
In order to get your brush 1 pixel in size, you'll need to click the button with a brush on it.
You can either select the default 1px brush, or select any of the round/square brushes and change the number in the size box to 1. This makes no difference.
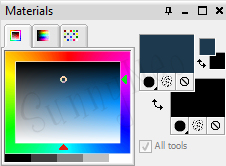
Once you've done that, it's time to draw your border. Select any colour you want from the Materials palette and carefully draw around the edges of the square.
If you'd like a colour that matches your avatar, you can use the eyedropper tool. Feel free to add a thicker border/another colour if you feel like it.
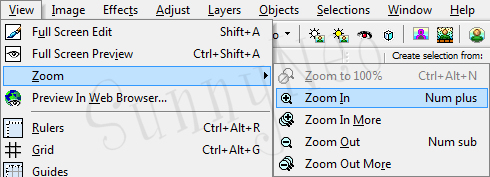
Drawing a border can be difficult. Zooming in often helps; you can either do this by using the scroller on your mouse, or going to View - Zoom - Zoom In.
Once you've drawn your border, your image should look like either of these:
Method 2: Making a border through Modify
If you have unsteady hands, perhaps this method is better for you. Deselect your image like you did before by right clicking with your mouse, or pressing CTRL + D. Once you've done that, you need to create a new raster layer. Do so by going to Layers - New Raster Layer. When you've clicked on this a new menu appears; don't change anything, simply click OK.
Go to Selections - Select All. Once you have the marching ants around your avatar, go to Selections - Modify - Contract.
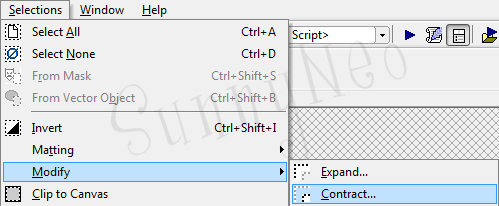
For this tutorial, we'll be using an outside border and an inside border. Put 1 into the box on the contract menu and then click OK.

Go to Selections - Invert. This will create a 1px marching ants border around your avatar.
Fill the image with the colour you want the outside border by using the flood/fill tool. This tutorial uses a dark blue, which was eyedropped from the doll's hair.
Once you've filled the selection, go to Selections - Modify - Expand. This works the same as the contract tool, but makes your selection bigger instead of smaller. Put 1 into the box. You can now fill the inner border with your second colour. This tutorial uses white.
To save a later mess, go to Edit and select Copy Merged. Paste the image as a New Image. You should now have two images exactly the same; continue to the next step with your new image.
Step 4: Adding Text
It's now time to add text. For this tutorial, we'll be using white text. Set the background colour to white (the second box in the materials palette).
Deselect again, then click the text button and choose the settings best suited for your avatar.
Redensek in size 9 is recommended, with anti-alias off. You can find the font at Dafont.com. More on how to install a font at the bottom of this page.
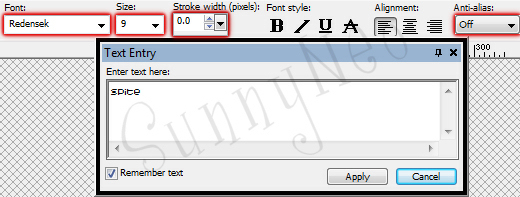
Position the text where you want it by dragging it around a bit. Once it's in the place you want it, decide whether you want a border around it or not; if you're happy with the way it looks, skip this step.
There are two ways to put a border around your text. The first is by using the modify tool. The other is by using the drop shadow tool.
Method 1: Using the Modify Tool
Go to Selections - Select All - Selections - Float. This will put marching ants around your text. Go to Selections - Modify - Expand, and put 1 in the box. Fill the selection with the colour you want. Voila!
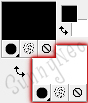
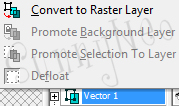
Note : If you get an error message, continue up to the float tool and then right click on the vector text layer, which can be found at the bottom right of the screen. Select Convert to Raster Layer and continue to the expand tool.
Method 2: Using Shadow Effects
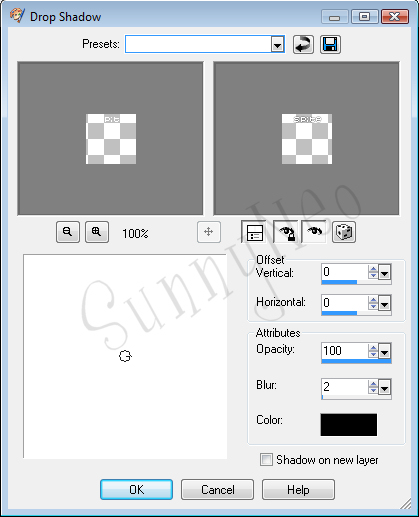
Go to Effects - 3D Effects - Drop Shadow. This will create a little shadow around your text.
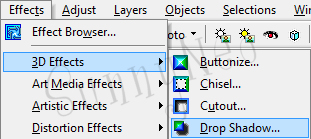
It's recommended to set the opacity to 100 and the blur to 2, perhaps 3 if it looks better. If you'd like to mess about with the offset (this pushes the shadow more to the top/left etc), feel free to do that. You don't have to have black as the shadow colour, you can choose whatever you think looks best.
When you have those sorted, decide whether you think that the text needs a stronger shadow or not. If it does, just repeat the last step as many times as you need to. When that is done, your avatar should look similar to this.
Step 5: Animate your avatar
Select the Copy Merged option and then paste the image into Animation Shop.
Step 6: Effects
Now, decide which sort of effects you'd like on your avatar. Text fading in and out? Letters blinking one by one? These last few steps are very easy and take pretty much no time to do.
Making the Fading Spite Avatar
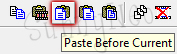
If you want the text fading in and out, go back to Paint Shop Pro and select Copy Merged for the avatar with no text. Use the Paste Before Current Frame option in Animation Shop.
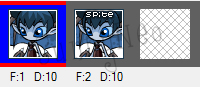
This will put the image into the frame just before your image with text.
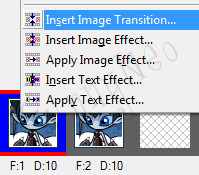
Right click on the image with no text and go to insert image transition.
Scroll to the option which says fade and select it. Feel free to have a mess around with the transition length; making it longer will make the effect last longer etc. The frames per second will also make it go slower/quicker depending on your settings.

If you'd like to make the text fade out as well, simply paste the avatar with no text next to the very last frame and select the fade tool on the LAST avatar with text.
You can watch your animation by clicking this button.
This will be your end result.
Making the Blinking Spite Avatar
If you'd like to make the text blink, simply copy the image with the default text into Animation Shop and colour each pixel of the text one by one in the colour you want (zoom is extremely handy for this tool); or alternatively, you can use the text tool and add each letter one by one.
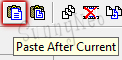
Use the Paste After Current Frame tool to add new frames in which you colour each individual letter; remember to Copy Merge each image.
In Animation shop, you can colour the letters similarly as you colour in Paint Shop Pro, use the colour palette (in combination with the eyedropper tool) for the colour, and the fill tool to fill the letters with a colour. Zoom in by scrolling with your mouse for a better overview.
If you'd like to slow the text down, either press CTRL + A, or go to Edit - Select All. This will highlight all of your images.

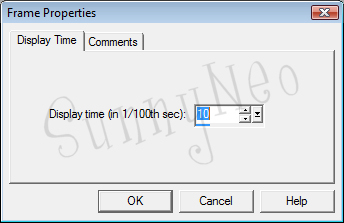
Go to Animation - Frame Properties.
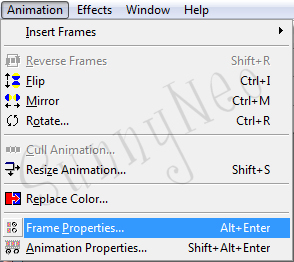
In the box will be a number. The bigger the number, the slower the frame; simple :)
To make just one or two frames slower, simply select them individually and use the frame properties tool.
This will be your end result :)
Making an avatar with a different shape
Now that you understand the basics, we can move onto different avatar shapes. You'll be using a circle for this section of the tutorial. These can be a bit complicated at times, but you'll get used to it in no time.
Step 1: New Image
Start off by using this template for a round avatar.

In order to get the edges to be transparent by the time you finish your avatar, create a new 50 x 50 transparent image (to make it transparent, tick the box near the bottom on the menu with the image size etc).
Set the background colour to white by right clicking on the colour from the materials palette.
Paste the image as a Transparent Selection. (Edit - Paste - Paste as Transparent Selection.)
If you like, you can change the colours of the borders to suit your avatar. Your border should still be selected (If not go to Selections - Select All - Float).
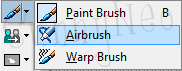
You can colour the borders either by using the airbrush tool. (Brush lightly from the center of the circle to the edges for a fading effect):
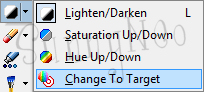
...or by using the target tool. (This will only colour the grey inside border into a different colour):
When you are done, deselect your image by going to Selections - Select None, or pressing CTRL + D.
Step 2: Layers
So that your image doesn't cover up the border, you'll need to go to Layers - New Raster Layer.
You can rename the layer when the menu appears if you want, but this isn't necessary.
View the layers menu (bottom right) and then drag your new layer underneath the one that says Raster 1.
Once you have that sorted, make sure that Raster 2 (or what you've named it) is highlighted in the layers menu. Paste your new image as a new selection and position it where you want, like in the screenie below.

When you are done, deselect your image by going to Selections - Select None, or pressing CTRL + D.
Then, make sure that you have Raster 1 highlighted in your Layers Menu.
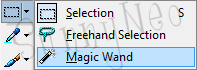
Step 3: Using the Wand to remove the edges
Zoom in a few times and look at the edges; you have the white bits covering the transparent part. Firstly, you'll have to set your selection tool to the magic wand.
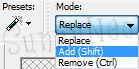
Make sure that your magic wand is set to "add".
Click on the four white corners of the avatar in order to select everything that you want to remove.
Highlight raster 2 again in the Layers Menu, and press delete on your keyboard. Voila the corners are transparent!
Once you've erased everything, you're ready to add your text/effects/anything. Have fun!
Here are some more shapes for you to experiment with ;)

|

|
 |
Other information
Installing fonts
If you decide to download a font, you will need to unzip it. You need Winzip to unzip maps, or if you have Windows XP, then you can just open the file you downloaded, and in the top left corner you can unzip the map. After you've unzipped the map, right click on the font (the blue TT icon), and select copy. Then you open Control Panel (you can find it in Start, either in Settings or straight away), and then open the map with Fonts. You right click and select paste, then your font is installed and you should be able to see it on the font preview.
Uploading Your Image
In order for you to actually use the avatar online, you need to upload the image somewhere. If you don't know how this works, you might want to take a look at our tutorial on uploading images. It can be found here.
If you don't know how to add your image to a page then also read out HTML Tutorial, in particular the chapter about images.
 {{ loadingMessage || 'Loading, one moment please'}}

