
Cutting Out Images Tutorial for Photoshop
What is this tutorial about?
This is a tutorial to learn how to cut images out of a bigger picture flawlessly using Photoshop CS. You could also use this tutorial in other versions of Photoshop, but the buttons and such wouldn't be in the same spots. You can download a 30 day trail version of Photoshop at PhotoshopSupport.Com
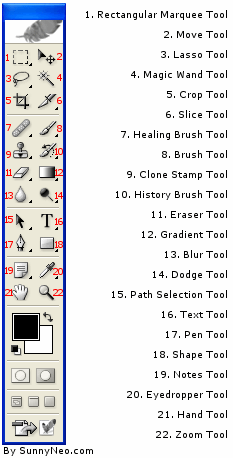
The tools
To avoid any confusion you can see an overview of all the Photoshop tools below, including their names and numbers.
Step 1: Getting started
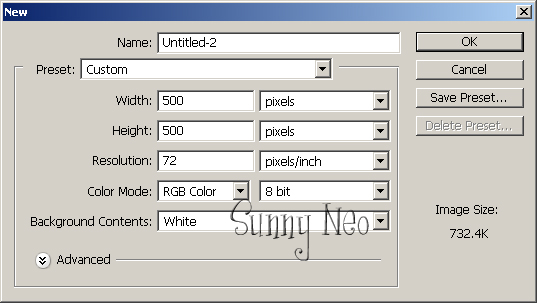
We're going to start by opening up a new document. Go to "File > New" and make your settings match the ones you can see in the image below (except the file name, that is not important). After you've done this, press OK.
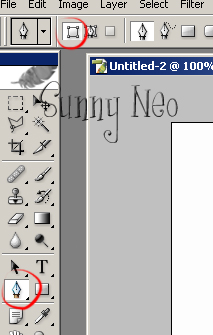
Select the Pen Tool (#17), and click on the "Shape Layers" button in the top.
Step 2: Practising with the Pen Tool
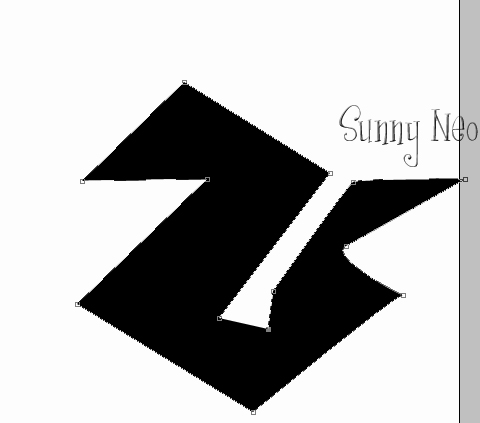
It's time for some practice with the Pen Tool to get used to it. Randomly click on your canvas, you'll see a shape start to take form.
See those little squares? Those are called Anchor Points, you create a new one with every click.
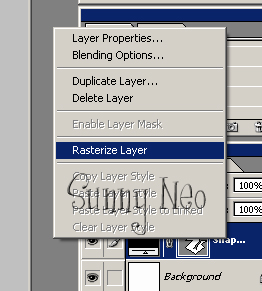
At the bottom right of your screen is your layers pallet. Right-click in the "Shape 1" layer (click on the name, not the image), then click on "Rasterize Layer."
Now your newly created shape should be quite smooth looking. Right-click again on "Shape 1" layer, and click "Delete Layer."
Time to try something new. Click anywhere on your canvas with the pen tool still selected. Now click somewhere else. Click somewhere else again, but this time, before you let go of your left mouse button to complete the click, drag it a little in any direction. This is how you curve lines with the Pen tool.
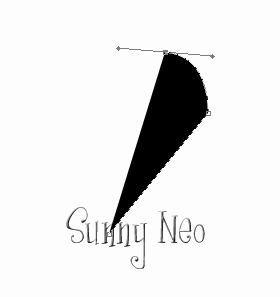
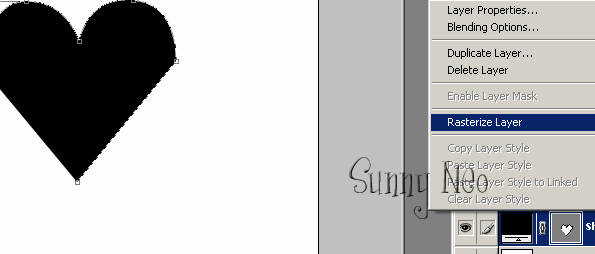
Mess around a little but more with curving lines to get used to it. Try to make a fun shape like a heart. Please note that it takes a lot of practice to make something like a heart, you will not be done after 2 tries.
When you think you've grown used to the pen tool, right-click on the Shape Layer and click "Rasterize Layer."
We don't need this shape anymore, you can delete it like you have before.
Click back on the pen tool, we're going to try one more thing before we begin cutting out images. Click a random spot on your canvas. Now, click another spot, but drag it fairly far to make a sharp curve.

Now, click below your previous spot, but don't do any dragging this time. See how the curve is automatically made? Mess around more with sharp curves so you can get the hang of it.

When you are done, remove this layer. You should now have a blank canvas with just a plain white background, and no layers.
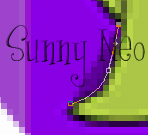
Step 3: Getting the image ready image
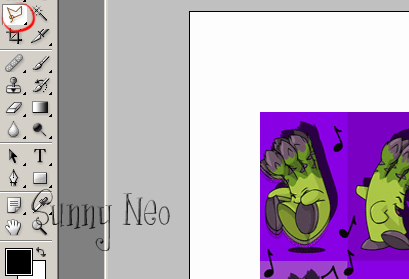
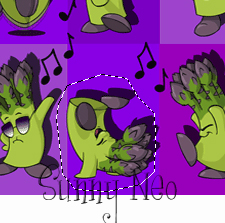
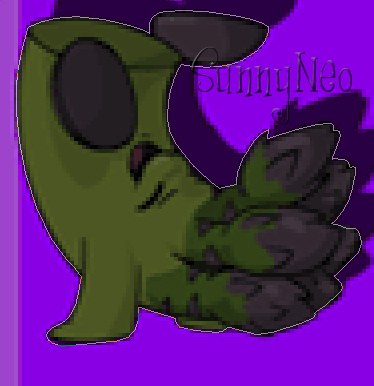
Now it's time to cut an image. For this tutorial, we will use this image here. Copy this image and then paste it on to your canvas by going to "Edit > Paste" (we did not open a new file, use the one we were making shapes on). Once pasted, we will select which little asparagus we want to cut out. Click on the Polygon Lasso Tool (tool #3, it's under the Lasso Tool, right click on that tool and a menu will appear where you can choose the Polygon Lasso Tool).
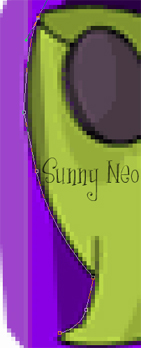
I'm going to use the second asparagus chia from the bottom row, it's break dancing. With the polygon lasso tool, click different spots surrounding the asparagus, much like we clicked with the pen tool, except there's no dragging done here. Make sure to connect the end of your lasso to the beginning, so a selection can be made. Once you're done, your image should look something like this.
Now right-click on the pasted image layer in the image pallet, in this case, Layer 1, and click on "Layer via Cut." This will cut your selection out of the pasted image.
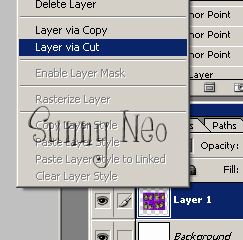
You should now have 2 layers, Layer 1 (image without breakdance Chia) and Layer 2 (breakdance Chia). Right-click again on Layer 1, and click 'Delete Layer'.
Now we need to zoom in to be accurate while cutting our little Asparagus Chia out. Click on the zoom tool (#22), and then click on your canvas until you're 600% zoomed in. You can see how far you're zoomed in on the right side of the screen, in the navigator menu. It could be that after you have zoomed in your Asparagus Chia will not fit into the window, if this happens, maximize the window.
Step 4: Cutting an image
Click on your pen tool again. Make sure that the Shapes Layers button is pressed (like you did in step 1).
Now, create your first Anchor Point at the tip of the asparagus' hand, then create a new one halfway up it's arm/hand, and drag it a bit so it curves to match the contour the original arm/hand.
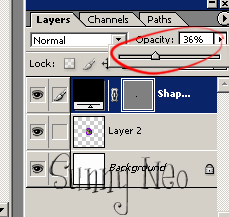
This new pen layer will eventually cover your picture, and get in the way, so you won't be able to see where to click next. To avoid this, change the opacity of your shape layer.
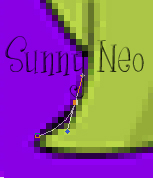
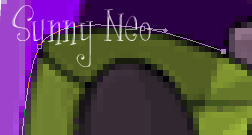
Back to clicking. Create a new Anchor Point in this asparagus' arm pit, so your image should now look like this.
Create a new anchor point about halfway up his back, drag it some to match the contour of his back. Create another one 3/4 of the way up his back, you shouldn't need to drag this one too much. Create another one at the bottom of his back, you will have to drag this one. Your image should look like this (this image has been scaled down to take up less space).
Now, create a new anchor point halfway across the bottom of his stalk, drag as needed. Create another one where his foot raises above his stalk. Your image should look like this.
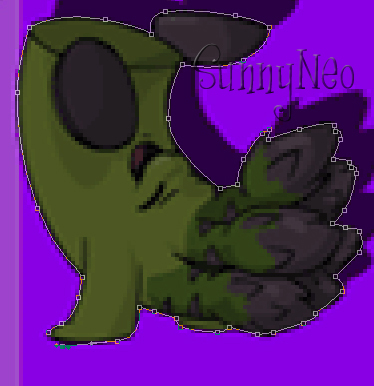
Try to follow the anchor points on the image below. If you mess up, press CTRL + Z and your last move will be undone. If you want to go back a few moves, you can click on a previous move in the History Menu at the right of your screen.
Tip: if you are having trouble with the anchor points on this image, you can copy this image and paste it into Photoshop and practice on this image first. That way you can click on the anchorpoints in this image, it will be good for practising the dragging.
If you get a really sharp curve, click as close to the last anchor point as possible, if done correctly, you will se a little hump in your line, like below.

Once your shape is closed, the dots showing your anchor points will go away.
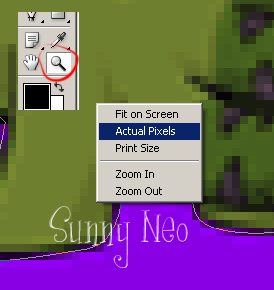
Now, time to get to the regular image size. Click on the zoom tool, then right click on the image. Click "Actual Pixels."
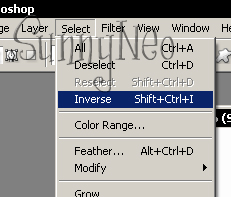
Now select the Pen Tool again, right click on the image. Click on 'Make Selection'. In the next menu put the settings to 0.

Now you have the Chia you want to cut out selected. Now go to the menu Selection > Inverse.
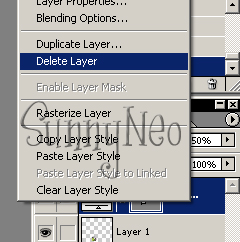
Then click on Layer 2 in the Layer Menu, press Delete.
Now that you've deleted the extra background around your chia, we need to delete the shape layer (all the stuff you just made with your pen tool). Right-click on the shape layer and click "Delete Layer."
Now you should have a perfectly cut out break dancing asparagus. Try this tutorial with larger and more complicated images.

 {{ loadingMessage || 'Loading, one moment please'}}

